Are you confused about replacing or repairing your vehicle’s cracked or chipped windscreen? Depending on where you live, your vehicle’s windscreen may get a hit due to many reasons. For instance, you may be driving to work, and a bunch of debris out of nowhere hits the windscreen, or a pigeon flew into the screen, cracking it. Construction work going on near where you park your vehicle may also be a reason. Anything can hit your windscreen and lead to unfavorable results. Ultimately, you may think that you need to change the whole windshield. Well, many people will think the same, but it depends on the crack on the screen. In some conditions, you can repair your shield. The best part is that you won’t need to visit a repair shop for that, as you can repair it by yourself at home.
Here is all you need to know about repairing your windshield on your own. However, you need to repair your windscreen as early as you can. It can get worse with time. Regardless of whether you are repairing the screen or installing a new one, this article will help you.
Repairing Windshield
When living in a crowded neighborhood, a chipped windshield is part of life. Replacing a windshield with a new one can be a headache, and you may end up spending a lot on your windshield replacement. In areas where there is mostly snow, or gravel salts, during spring, winter, and fall, it is easy to get a chip on the windscreen. Especially in spring, after a long winter season, almost everyone is complaining about their windscreens chipping. And if you have a new vehicle, you may get frustrated.
When there is a change in temperature, like when it is freezing cold outside your vehicle, and there is a heater inside, the chipping will not take long to convert into a crack. It is understandable how dangerous and hazardous these cracks and chips can be as they can block your sight of the road while you’re driving. Furthermore, if the crack is deep, the pan will start to fog from the middle or inside.
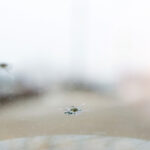
The first thing that you should do is to observe the chip through a magnifying glass closely. Before fixing the chip, you need to know what it looks like. There are different types of chips. You can repair some of them on your own, and for others, you need services from a repair shop.
Types of Cracks You Can Repair
You can fill in chips on the surface of your windscreen glass on a shallow angle or perpendicular angle. So any chip that has flaked a bigger glass piece cannot be fixed. Moreover, you cannot fill a chip with a leaf or cone shape. The first way to fix the chip is by filling it. You do this by injecting acrylic adhesive or epoxy. You should know that with this method, minimal flaws will still be visible. Furthermore, you need to fill as much of the chip as you can.
However, this flaw will be better than keeping your chip unfilled and waiting for the chip to extend to a longer crack, which is often irreparable. Injecting this material inside the chip will stop the chip on your windscreen from spreading. You should fix the windshield as soon as it gets damaged because debris and dirt can fill in, which prevents the injected solution from covering the chip. This will make it difficult to clean.
Kits for Repairing Windshield
You can find repair kits for a windshield crack from any auto part shop or stores such as Target and Walmart. You can also visit traditional stores such as AutoZone and Pep Boys. If you can’t find the kit, ask the repair shop and professional mechanics to do it for you. You also have an option to purchase from Amazon, as they will deliver the kit to you overnight. There are multiple brand options that you can choose from while purchasing the kit. Top options for windshield repairing kits are Gliston, Loctite, ARISD, RainX, and Permatex. To purchase the right option, you can search for the product and check out its customer reviews.
The process of using the kit is different from one brand to another. Nonetheless, the underlying principle of all methods is similar. You need to fix some of the windshields for testing the products, to see the result. And believe me, you will be amazed to see the results. You can read the methods below. However, you should keep in mind that whichever kit you are using, you need to dry the surface before applying the solution and keep at room temperature. You also need to avoid any water in the chip before applying the solution. So clean the screen if it is wet before starting the procedure.
Avoid using any detergent or window cleaner if you find the surface dusty. With the help of acetone and other lighter fluids, you can clean and dry out the surface. However, you should not use an excessive amount of fluid that it dribbles over the glass and remove off the paint, or makes the screen even worse.
- Pre-Mixed Adhesive
First, you need a kit from Loctite, which is a simple kit and includes an uncomplicated syringe and an adhesive on one part. You need to peel off the film from one side of the adhesive stripe, which has a precut. Now clean the glass and apply it to the center of the chip. Rub it on with your thumbnail’s back or an object for settling it down. Now peel off the remaining film.
The plastic adapter should be oriented to keep the fitting as vertical as possible and stick the film to it. Clean the screen again and pull off the cap of your syringe. The edge of the syringe should be pointy so that the adhesive solution does not drop on the fender. You need to attach the adapter and the syringe together.
Next, be careful with this part. You need to keep your watch in front of you and keep an eye on the second hand or keep your Smartphone on stopwatch mode. Hold the body of the syringe with one hand and stabilize it. Pull away the handle of the syringe as much as you can. Now hold the syringe’s handle for a minute in the same position. This will partially vacuum the syringe in the crack.
When you are holding the syringe in the vacuum, the air present inside the crack will bubble up in the syringe as the adhesive enters the chip and the glass. Now leave the handle. Now you do not have to follow the handle of the syringe and let it abruptly go on its own. The adhesive will sink in the crack as the pressure from the handle is making it move.
You need to repeat this slam and suck process five to six-time and even more. This way, you can force the adhesive in the crack completely. Now, you should remove the adhesive sheet, adapter, and syringe. On the glass’s surface, you will find an adhesive film. With the help of an alcohol-soaked towel, chase back the film. Just leave a pimple of the adhesive above the crack without disturbing it till it cures on its own in a few hours.
As the pimple hardens, you should take a razor blade with a single edge and shave off the adhesive remaining on the top. If the blade is sharp enough, a single pass will remove the pimple.
- Two-Part Adhesive
You can also try a two-part adhesive repair kit. This method is very uncommon. However, you should try this method once to check if it is okay for you or not. For this method, you need to mix two vials in a small quantity of hardener and adhesive in a syringe before you start the process. This is really simple to do.
Syringe adapter and adhesive disc share some similarities. Although they are not identical, the process of applying the solution is the same. The method of fixing the windscreen is a complex method. You need to use an arrangement of wire latch on the body, which will drops in two notches when necessary on the handle.
It involves using a pushpin in the body, which is very simple. This pin will serve as a valve to let the air out of the body when needed and inside the body. Once you have attached the syringe with the adapter, which is already stuck with the adapter to create a vacuum, you should then remove the pushpin.
Then, you will push the air out through bottoming the plunger of the syringe, insert the pin inside, and pull away from the handle till you feel the clip clicking in the slot. By doing this, the plunger will create a partial vacuum for some time.
Instead of releasing the pressure rapidly, you need to admit air inside the syringe barrel by removing the pin. When replacing the pin, you need to seal the hole, the clip will be released, and the handle will slightly force the adhesive inside, pressurizing the barrel for one minute inside the chip. Repeat this process a few times and fill in the crack with the adhesive.
Conclusion
Both kits will work well if you follow the procedure. After you are done shaving the access adhesive from the top of the crack, it will look perfect. The adhesive will remain clear as the refractive index of glass and adhesive are the same, which will make the crack invisible from every angle. Visit BudgetMotorsReno.com & Blog.BudgetMotorsReno.com & Follow my blog with Bloglovin